Configuring ESXi 6 (vSphere Setup Part 2)

This is part 2 of a series on setting up vSphere.  If you missed the first part you can find it here.

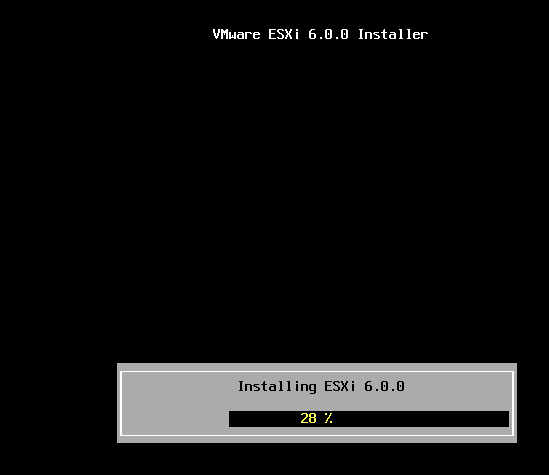
Now that you have installed ESXi 6 it is time to start configuring.

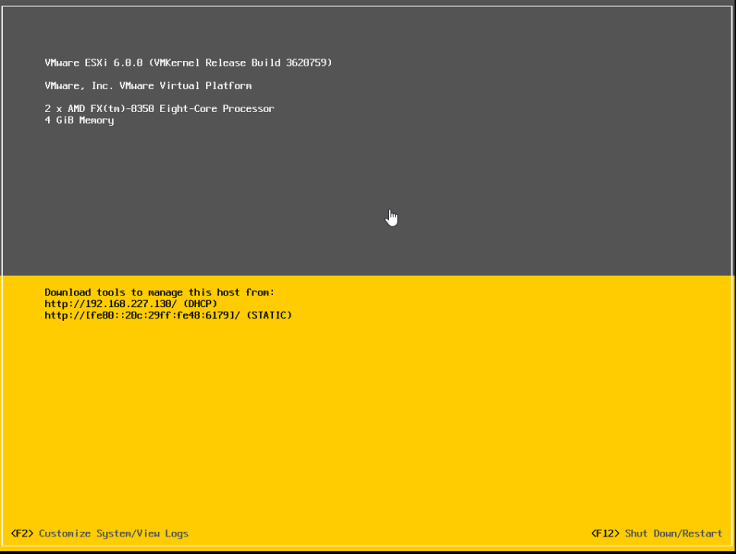
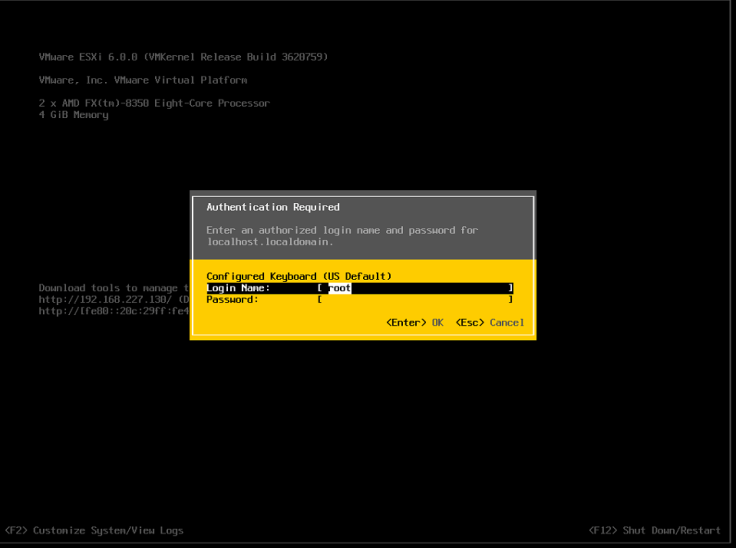
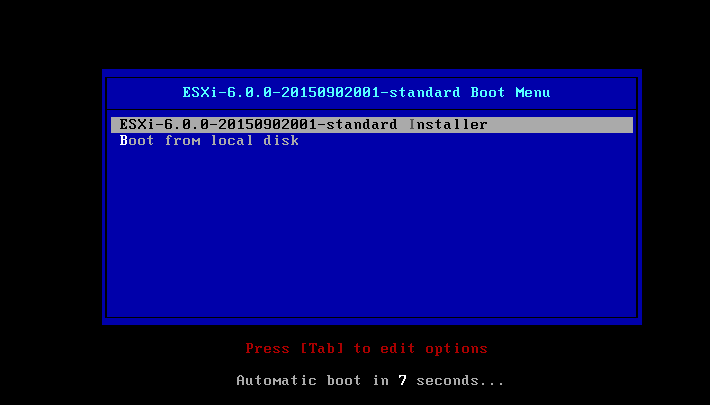
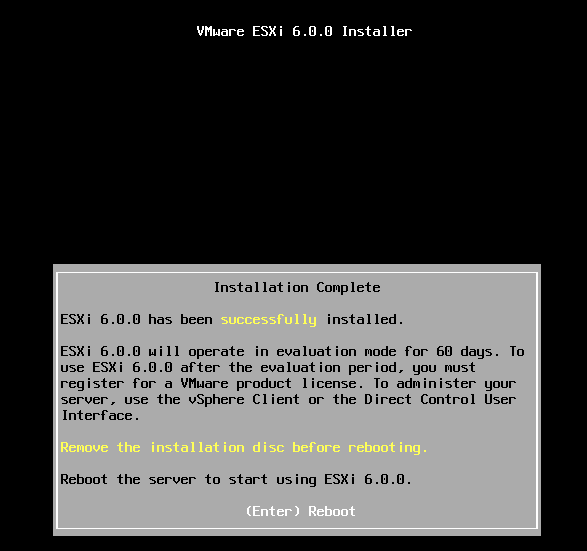
  1. Once the host reboots you will be greeted with this screen.  Press F2 to go to the setup screen where you will login with root and the password you provided earlier.2016-06-03 14_17_49-OFFICE - TeamViewer - Free license (non-commercial use only)2016-06-03 14_19_16-OFFICE - TeamViewer - Free license (non-commercial use only)


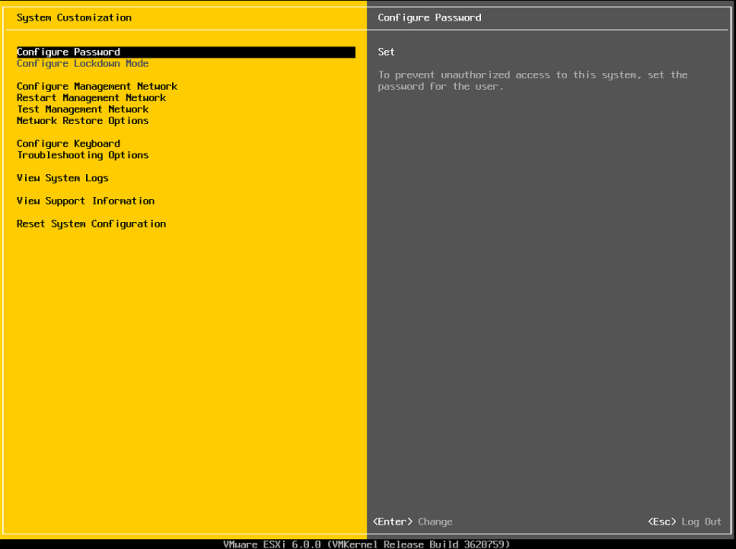
2. Now its time to configure the management network. Go to Configure Management Network and then to Network Adapters.

2016-06-03 14_21_00-OFFICE - TeamViewer - Free license (non-commercial use only)2016-06-03 14_21_17-OFFICE - TeamViewer - Free license (non-commercial use only)

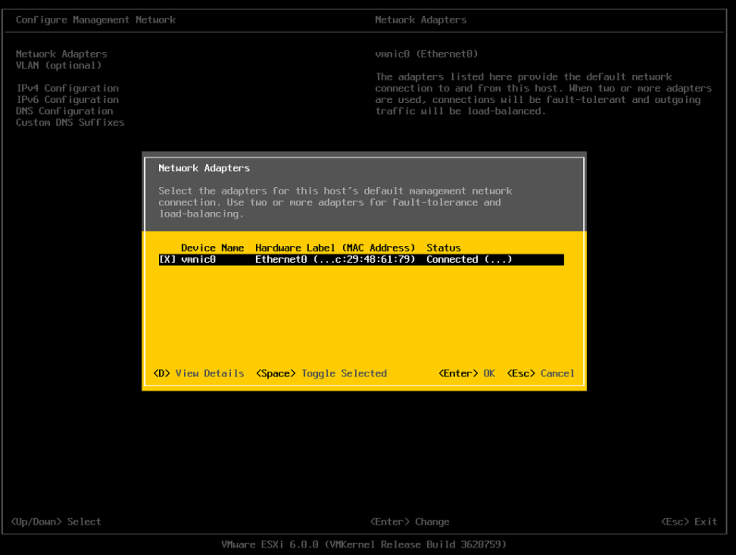
3. Make sure all the NIC’s you want to use for management are selected.  Since this is in an nested lab I only have one to use.

2016-06-03 14_23_11-OFFICE - TeamViewer - Free license (non-commercial use only).png

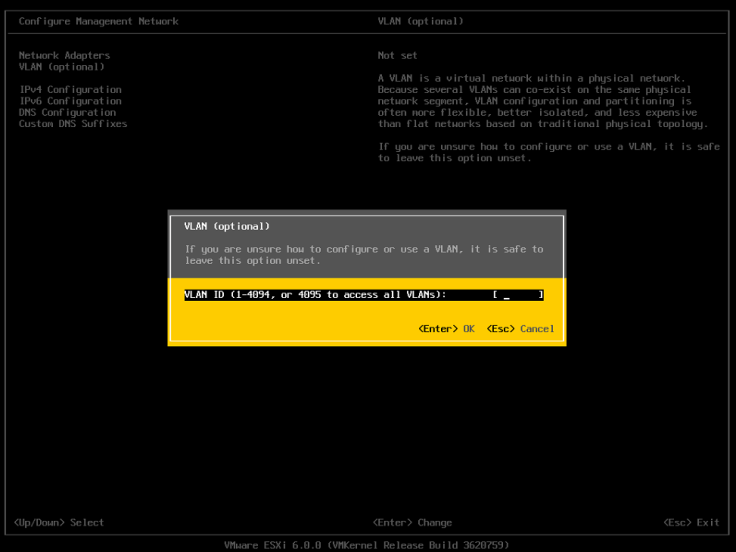
4. Now for a test lab this option is not really needed, but here is where you can configure the VLAN for the management network.

2016-06-03 14_24_53-OFFICE - TeamViewer - Free license (non-commercial use only)

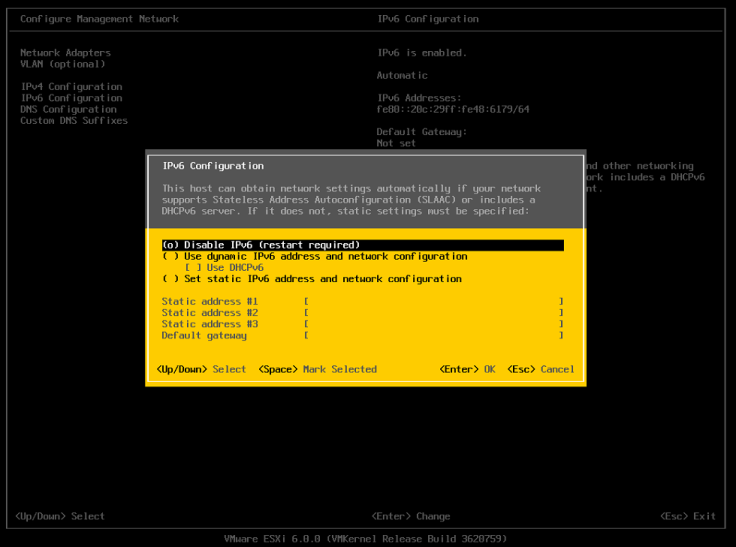
5. Set the IP to static and fill in the appropriate IP information for your environment.  Unless you want to you use it is best to disable IP6.

Capture.PNG

2016-06-03 14_42_05-OFFICE - TeamViewer - Free license (non-commercial use only)

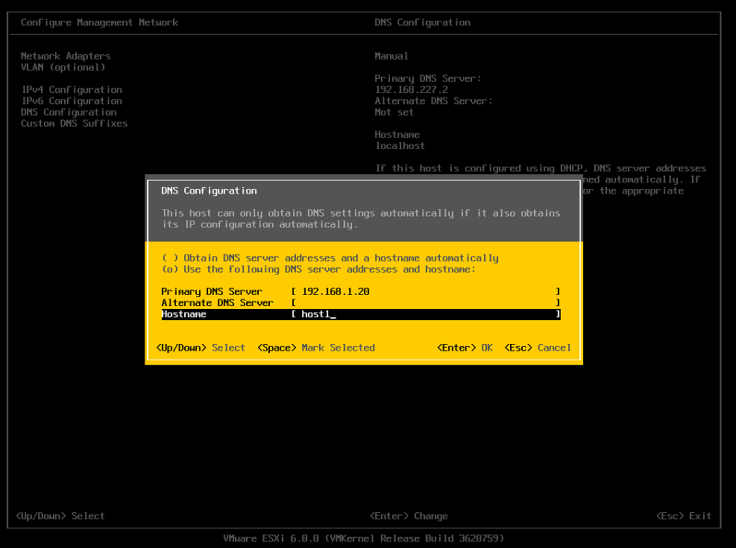
6. Set the appropriate DNS  and hostname information.

2016-06-03 14_41_36-OFFICE - TeamViewer - Free license (non-commercial use only)

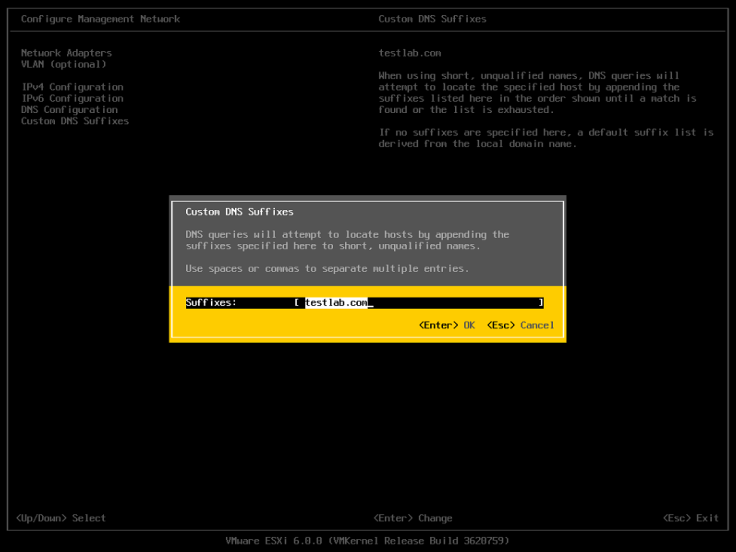
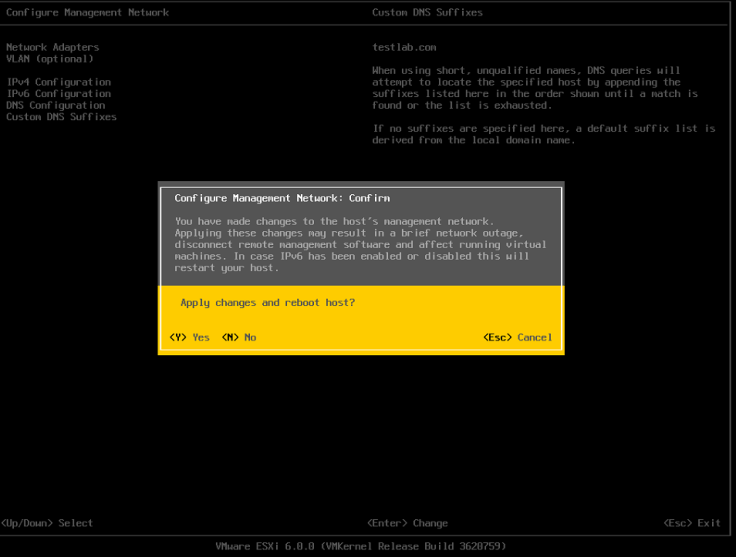
7. Setup the custon DNS suffix which would be your domain name.

2016-06-03 14_43_42-OFFICE - TeamViewer - Free license (non-commercial use only)

8.  Now its time to reboot the host so all of the configuration can take affect.

2016-06-03 14_44_36-OFFICE - TeamViewer - Free license (non-commercial use only)

In part three of setting up ESXi I will go over the deployment of the VCSA.


Installing ESXi on Bare Metal (vSphere Setup Part 1)

Installing ESXi is a simple and straight forward process, but there are a few things you need to keep in mind.  The hardware compatibility list is very important.  You should always make sure your hardware is on it if you are using it in an production environment. In a test environment the setup will probably work, but there could always be some issues you may encounter.

We will cover the following items.

  • Check hardware compatibility
  • Download the ESXi image
  • Create bootable image
  • Install
  • Configure

Hardware Compatibility

  1. Check for hardware compatibility here.  If your system is not listed and your using this for test  then have no fear.  You will probably be able to install and run everything without and issues.

2016-05-20 14_19_24-VMware Compatibility Guide - System Search.png

2. Go into the BIOS and make sure the CPU virtualization support is turned on.

Download ESXi

  1. Download ESXi from the VMware website.

2016-05-20 14_20_47-Evaluate and Download VMware Products for a Virtual Infrastructure - VMware _ Un

Once you have the ISO you can burn it to a CD or create a bootable USB drive.  If you want to create a bootable USB drive Rufus works really well for that.

Installing ESXi

  1. Choose the ESXi installer or wait for it to default to that.

2016-05-20 14_25_06-VMware ESXi 6 - VMware Workstation

2.  You will see two different progress screens.

2016-05-20 14_25_24-VMware ESXi 6 - VMware Workstation

2016-05-20 14_25_35-VMware ESXi 6 - VMware Workstation2016-05-20 14_27_18-VMware ESXi 6 - VMware Workstation

3. Press enter then F11.

4. Choose location to install it.

2016-05-20 14_30_55-VMware ESXi 6 - VMware Workstation

5. Choose language

2016-05-20 14_31_34-VMware ESXi 6 - VMware Workstation

6. Choose password

2016-05-20 14_32_40-VMware ESXi 6 - VMware Workstation

7. It will not scan your system for its hardware.

2016-05-20 14_34_46-VMware ESXi 6 - VMware Workstation

8. Press F11 to insall.

2016-05-20 14_35_43-VMware ESXi 6 - VMware Workstation

9. Wait for the progress bar.

2016-05-20 14_36_36-VMware ESXi 6 - VMware Workstation

10. Press enter to reboot.

2016-05-20 14_38_00-VMware ESXi 6 - VMware Workstation

Now ESXi is installed.  In my next post I will show how to setup the configuration on a ESXi host.

Default Isolation Address

If a host thinks it is isolated by default it will ping its gateway.  It is best practice to have more than one isolation address, and you can have up to 10 of these.  Duncan Epping has a good article on it here.  Here is a simple script I found somewhere on the web.

$cluster = Get-Cluster -Name ITN

New-AdvancedSetting -Entity $cluster -Type ClusterHA -Name ‘das.isolationaddress1’ -Value 1.2.3.4

New-AdvancedSetting -Entity $cluster -Type ClusterHA -Name ‘das.usedefaultisolationaddress’ -Value false

#Disable and reenable HA

Set-Cluster -Cluster $cluster -HAEnabled:$false

Set-Cluster -Cluster $cluster -HAEnabled:$true

Analyzing vSphere with Free Tools “Syslog”

Virtualization is a great technology, but sometimes it can be hard getting a closer look into your environment.  Over the next few post I am going talk about a few free tools that I use in my environment.  They have given me a lot of support in managing my environment, and I would like to think the people who made them.

Syslog can be a very useful tool.  The problem with it is that it can be very painful to use.  Luckly VMware has a great tool for that and that tool is LogInsight. It makes a great syslog server and has a lot of other features that you may find invaluable.  It is a paid product so what is a great alternative?  Sexilog is that great alternative.  With it you point all your esx host to it and watch the magic happen. Very quickly you get a better insight what is happening inside your environment. It may not have as many features as LogInsight, but nothing beats it on feature compared to price.

VM Fails to Power On

Recently I had a strange problem.  Power off VM’s would not power on, and would give this generic error.

power on error

I found KB 1006232 and was able to power on the VM by command line, but I was still not able to power them on by directly connecting to the host through the C client.  Or using vCenter through the web and C client.  I tried a lot of things, but in the end restarting the vCenter server fixed everything.

New Port Group not showing up under Host

I was recently built up a new Cluster of 3 host with a Distributed Switch.  I had created my Management and vMotion groups with no issues, but when I created the server port group it did not show up under hosts.  The VM’s were already built and working on the network, and  I only noticed this issue when I tried to vMotion one of the VM’s to another host.

To fix the issue I had to create a new port group for that vlan and migrate the VM’s over to it.  I then deleted the old port group, and renamed the new one to the old ones name.  I have no idea why this happened my only guess is that I hit some really weird bug.

Where is ESX installed?

Under vCenter go to the Host > Configuration > Storage > Devices

1

Then look for a datastore that has a few partitions such as Legacy MBR and VMware Diagnostic.  That should be where you ESX is booting from.

2


Using PowerCLI to change the Syslog server for your ESX host.

I recently discovered SexiLog to use with VMware ESX host.  I needed a quick and easy way to change where the ESX host sent there logs to.  Doing some google searches I was able to put together a quick PowerCLI script.  In about 5 minutes I was able to change the syslog for all of my ESX host.

$ESXLOG = “1.2.3.4”
Get-VMHost | Foreach {
Write-Host “Adding $ESXLOG as Syslog server for $($_.Name)”
$SetSyslog = Set-VMHostSysLogServer -SysLogServer $ESXLOG -SysLogServerPort 514 -VMHost $_
Write-Host “Reloading Syslog on $($_.Name)”
$Reload = (Get-ESXCLI -VMHost $_).System.Syslog.reload()
Write-Host “Setting firewall to allow Syslog out of $($_)”
$FW = $_ | Get-VMHostFirewallException | Where {$_.Name -eq ‘syslog’} | Set-VMHostFirewallException -Enabled:$true
}

Using PowerCLI to retrieve Snapshots

Forgetting about snapshots can lead to serious issues.   Not only does the snapshot make the VM perform slower, but it can lead to space issues on the datastore.  You can use PowerCLI to find out what snapshots you have in your vCenter enviroment.

Run PowerCLI and connect your your vCenter instance. Then run these commands

Get-VM | Get-Snapshot | Select, VM, Name, Description.

Home Lab Setup (Part 1)

I am working on achieving the VMware VCIX. To practice for this I am setting up a home lab.  There are other options than using an home lab such as Ravello, but I wanted to set up my own self enclosed enviroment. I will be utilizing the VMUG Advantage for licensing aspect of the VMware products in my lab.

My setup includes

  1. AMDFX 8-Core CPU
  2. 16Gb Ram
  3. 1 SSD
  4. 2 7200RPM drives
  5. Workstation 12

Setup is 3 Host within Workstations each running on an individual HD.  This should spread the IO load and keep the environment running at a acceptable level.

First I deploy the 3 host.

  1. From Home screen select “Create New Virtual Machine”
  2. Select Typical
  3. Select Install Disk Image and chooise your vSphere 6 ISO
  4. Name Host and Select first HD
  5. Store as single file.
  6. Select power on and finish

Do this two more times for the other 2 host and HD.

Now under Network Adapter settings for our 3 host we select “Custom VMnet2” and we will use this as our Management network.

Now go into each host and fill in all the network information such as the IP and gateway.

Now we have a nested virtualized lab. With step 2 I will setup the vCenter appliance and management workstation for connecting to everything within the enviroment.

Blog at WordPress.com.

Up ↑