Preparing for a vCenter Server Migration using…

Preparing for a vCenter Server Migration using the vSphere 6.0 Update 2m Migration Tool – Part 2

Preparing for a vCenter Server Migration using…

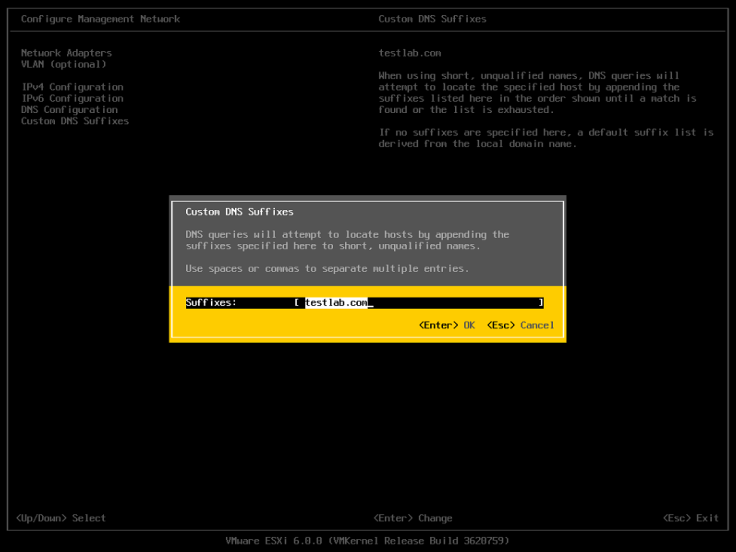
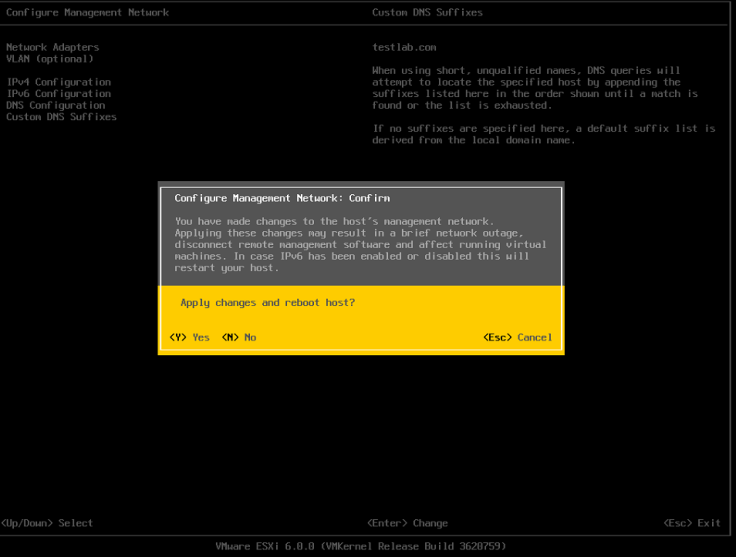
The first post of this series covered pre-migration considerations for both the vSphere Single Sign-On domain and vCenter deployment models. Now it’s time to focus our attention on the two co-stars of the show, the Windows vCenter Server and Database. When it comes to the Windows vCenter Server there are plenty of things to consider such as networking, The post Preparing for a vCenter Server Migration using the vSphere 6.0 Update 2m Migration Tool – Part 2 appeared first on VMware vSphere Blog .


VMware Social Media Advocacy

vCenter Design

I am currently working on a redesign of out VMWare vSphere environment.  Currently vCenter is running on Windows with and embedded PSC.  It is also using an external SQL database that is managed by an DBA.  I wanted to get this design up to date using best practices, and to also get away from  using the external SQL database.    I have two data centers one is for “production” and the second is for “Disaster Recovery”.  To create high availability the each side will have its on vCenter connected to two PSC’s.  They will be load balanced with an F5.  Here is a quick high level design I created.capture

To set this up I had to first deploy the two PSC’s for the production data center.  I then setup load balancing with the F5 following this KB.

Now that the new environment is all setup I connect the two vCenter together using Enhance Link Mode.  This will allow me to manage both vCenter’s from one location and to do vMotions between the two vCenters.  To start the migration of host and VM’s to the new vCenter I must first set the distributed port groups to ephermal.  You can read more about ephemeral ports from Chris Wahl and from VMWare KB.  Doing this will allow the host to control the binding of ports instead of vCenter.  I will also duplicate my Distributed Switch structure in the new vCenter.

Now that all of this is done I can disconnect a host, and then reconnect it to the new vCenter.  Then I  will use the distributed switch migrate all the VM’s to the new Distributed Switch.  I will also have to reinstall all my plugins and recreate my folder structure.  Once everything is moved over everything is done with no down time.


Delete Folder on Isilon From Command Line

With the Isilon you can do most of your daily work with the GUI.  Sometimes you need to go down to the command line to do the things you don’t normally have to do.  Recently with a file migration I had some issues, and had trouble deleting the directory.  To fix this issue I had to run this command.


isi job start treedelete –path=<PATH TO DIRECTORY FOR DELETION>

isi job status

Find Block Size with vscsiStats and Other Storage Statistics.

Ever wonder what block sizes your VM’s are using for writing and reading to disk?  I always have and I recently found a way to get this information out of the ESXi hypervisor.  You can also get a lot of other data such as random and sequential writes, latency, and a few other items.

  1.  Connect to the host with SSH.
  2. Enter the command “vsciStats -l” This will list all the VM’s on that host and its disk.
  3. vsciStats -s will start that stats collection.  You can pair this down by using the -w for the world group id and -i for handle id.
  4. vsciStats -p ioLength -w 123456 would display the block sizes for that particular VM and drives.
  5. -h will give you a list of all the possible variables to use.

Set NTP on all host in vCenter

Here is a Powershell script that will set NTP on all the ESX host connected to your vCenter.

First connect to the vCenter using Connect-VIserver then run the following code.


#Get Host
write-host “Gathering ESX Host”
$esx = get-vmhost

#Configure NTP server
write-host “configuring NTP”
Add-VmHostNtpServer -VMHost $esx -NtpServer 10.10.16.220

#Allow NTP queries outbound through the firewall
wrtie-host “Setting Firewall Permissions”
Get-VMHostFirewallException -VMHost $esx | where {$_.Name -eq “NTP client”} | Set-VMHostFirewallException -Enabled:$true

#Start NTP client service and set to automatic
write-host “Starting NTP service”
Get-VmHostService -VMHost $esx | Where-Object {$_.key -eq “ntpd”} | Start-VMHostService
Get-VmHostService -VMHost $esx | Where-Object {$_.key -eq “ntpd”} | Set-VMHostService -policy “automatic”


VMworld US Content Catalog is now live!

VMworld US Content Catalog is now live! Schedule Builder launches July 19th

VMworld US Content Catalog is now live!

The 2016 Content Catalog allows registered and prospective VMworld attendees access to the VMworld agenda, with the ability to peruse breakouts and note sessions of interest. You can search and filter to your heart’s content by track, category, session format, industry, role, technical level, speaker name, location (US or Europe), and keyword search. You cannot schedule sessions in the catalog.


VMware Social Media Advocacy

Configuring ESXi 6 (vSphere Setup Part 2)

This is part 2 of a series on setting up vSphere.  If you missed the first part you can find it here.

Now that you have installed ESXi 6 it is time to start configuring.

  1. Once the host reboots you will be greeted with this screen.  Press F2 to go to the setup screen where you will login with root and the password you provided earlier.2016-06-03 14_17_49-OFFICE - TeamViewer - Free license (non-commercial use only)2016-06-03 14_19_16-OFFICE - TeamViewer - Free license (non-commercial use only)


2. Now its time to configure the management network. Go to Configure Management Network and then to Network Adapters.

2016-06-03 14_21_00-OFFICE - TeamViewer - Free license (non-commercial use only)2016-06-03 14_21_17-OFFICE - TeamViewer - Free license (non-commercial use only)

3. Make sure all the NIC’s you want to use for management are selected.  Since this is in an nested lab I only have one to use.

2016-06-03 14_23_11-OFFICE - TeamViewer - Free license (non-commercial use only).png

4. Now for a test lab this option is not really needed, but here is where you can configure the VLAN for the management network.

2016-06-03 14_24_53-OFFICE - TeamViewer - Free license (non-commercial use only)

5. Set the IP to static and fill in the appropriate IP information for your environment.  Unless you want to you use it is best to disable IP6.

Capture.PNG

2016-06-03 14_42_05-OFFICE - TeamViewer - Free license (non-commercial use only)

6. Set the appropriate DNS  and hostname information.

2016-06-03 14_41_36-OFFICE - TeamViewer - Free license (non-commercial use only)

7. Setup the custon DNS suffix which would be your domain name.

2016-06-03 14_43_42-OFFICE - TeamViewer - Free license (non-commercial use only)

8.  Now its time to reboot the host so all of the configuration can take affect.

2016-06-03 14_44_36-OFFICE - TeamViewer - Free license (non-commercial use only)

In part three of setting up ESXi I will go over the deployment of the VCSA.


NWLA Tech Meetup

For anyone in the Northwest Louisiana Area we are having our first Technology meetup.  If you would like to attend you can register here.  See you there!


Blog at WordPress.com.

Up ↑