Stretched clustering has been something that I have wanted to set up for my home lab for a while, but it would not be feasible with my current hardware. Recently I was selected to be a part of the vExpert program for the third year. One of the perks of this is the use of Ravello cloud. They have recently made a lot of advancements that has greatly increased the performance. Now they have also added a bare metal option which which makes the performance even greater. I am skipping most of the steps to setup vSAN, and trying to only include what is different for a stretched cluster.
The high level architecture of a stretched vSAN cluster is simple.
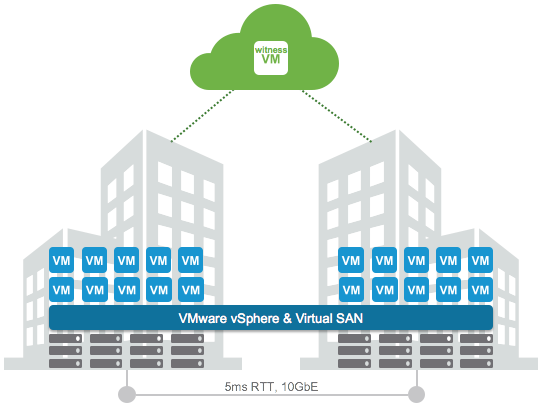
- Two physically separated clusters. This is accomplished using Ravello Availability grouping.
- A vCenter to manage it all.
- External witness. This is needed for the quorum. Which allows for an entire site to fail with it and the vm’s to fail over.
- Less than 5ms latency between the two site. This is needed because all writes need to be acknowledged at the second site.
- 200ms RTT max latency between clusters and witness.
If this was a production setup there would be a few things to keep in mind.
- All writes will need to be acknowledged at second site. So that could be an added 5ms of latency for all writes.
- You can use layer 2 and 3 networks between the clusters. You would want at least 10gb for the connection between sites.
- You can use layer 2 and 3 networks with at least 100mbs for the witness.
Deploying on Ravello
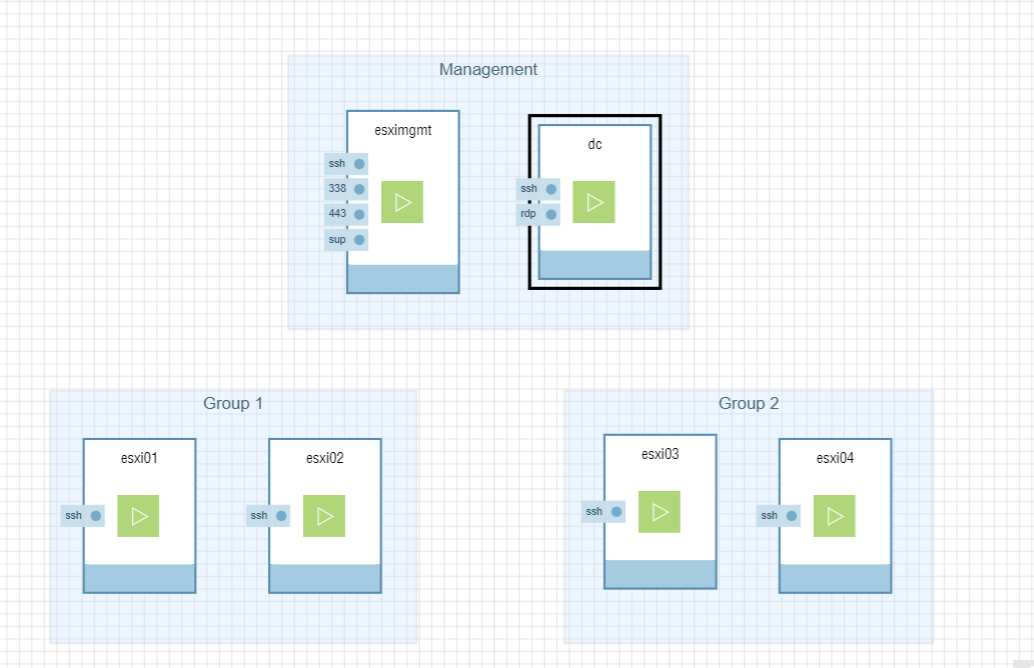
For the architecture of this deployment we will need 3 sections
- Management
- Cluster Group 1 (Availability groups simulate separate data center)
- Cluster Group 2 (Availability groups simulate separate data center)
- vSAN network and Management/Data Network
Management
There needs to be a DNS server and a vCenter. I used Server 2016 to setup both the DNS server and Domain Controller. I used the vCenter appliance 6.5 which I then deployed to an separate mangement ESXi hosts.
Cluster Groups
These consist of 2 ESXi 6.5 hosts each. They use Availability Groups to keep them physically separated to simulate the stretched cluster. Group 1 used AG1 and Group 2 used AG2

Network
I manually setup the DNS entries on the Server 2016 DNS, and the two networks consists of the following.
- 10.0.0.0/16 Data/Management
- 10.10.0.0/16 vSAN
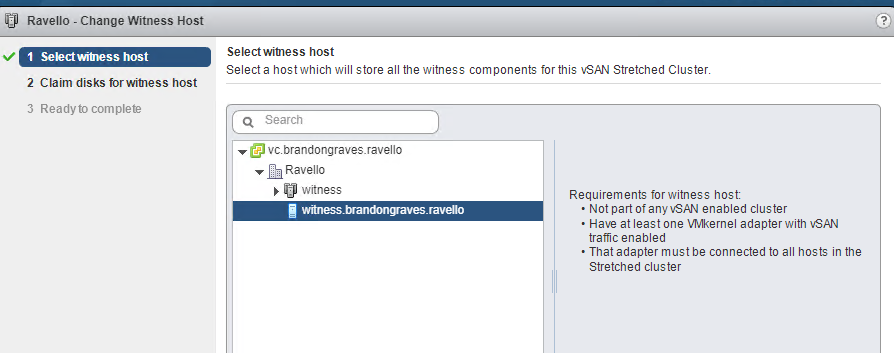
Witness
The witness is an easy to deploy OVF. It creates a nested ESXi host that runs on top of a physical host. The networking consists of the following
- vmk0 Management Traffic
- vmk1 vSAN Traffic
Once the OVF is deployed add the new witness host into vCenter. You will see it in vCenter as a blue ESXi host.
Creating the Cluster
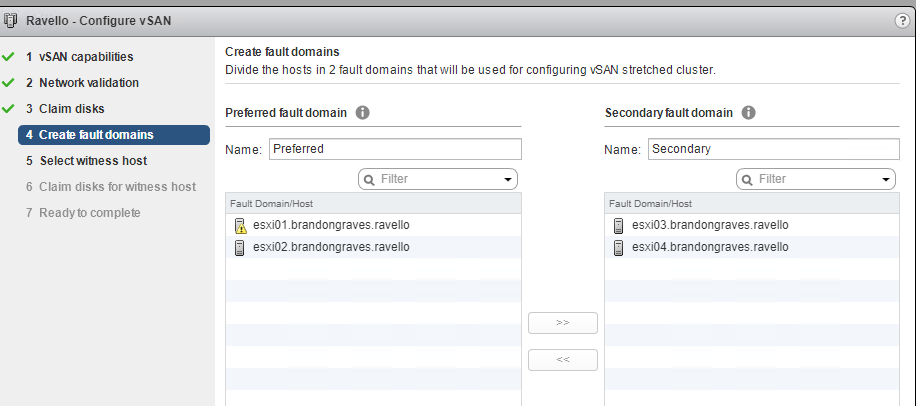
Now that every is setup and online it is time to create the cluster. All four hosts need to be in one cluster in vCenter. Go to the cluster settings and start the setup of vSAN. Choose configure stretched cluster.
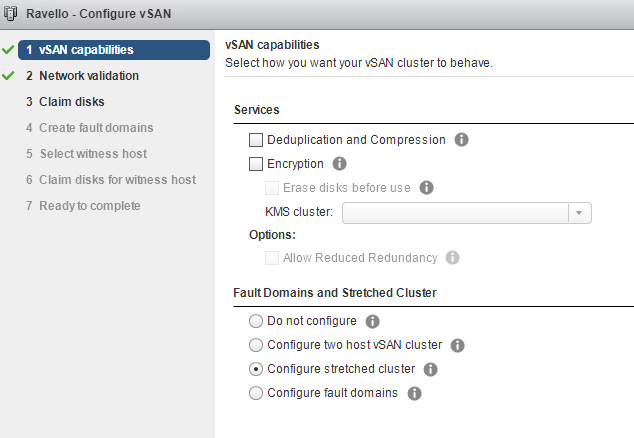
Now break out the two fault domains to correspond to the availability groups setup on Ravello
After the disk are claimed you now have a stretched vSAN cluster that provides high availability across two data centers. One cluster or one node can go down, and your VM’s can fail over and keep on running.


 Wow how time flies. VMworld was just last week, and its hard to believe that its already over. It was a very busy week with all of the announcements from VMware. Visiting with all of the vendors and seeing what new products they are offering. So much happens in such a short amount of time. I never like the process of traveling. All the time spent commuting to the airport just to wait a few hours to board the plan. With all the possible delays I always a fear that I will get trapped in the airport over night. In the end it is all worth it because it was an exciting week.


Recent Comments